Friday, March 1, 2013

Carousel Cake

Kids just love carousel rides and I just cannot understand why.  I don't enjoy rides going round and round, makes me giddy all the time.  I'll rather go for more exciting rides, give me roller coaster anytime.
 
The first time I saw a carousel cake was in Wendy's blog.  I never knew such a cake exist.  I told myself, one day I'll make this cake, one day....  To my own surprise, I decide to make it for DD3 this year.  All my children are unique but DD3 is exceptionally special as her birthday falls on 29 Feb.  I mean, how many of us can plan our birthdate to be on this date?
 
To celebrate her very special day, I decided on a carousel cake for her school celebration.  But this decision got me really busy.  I want the cake with mostly edible items/decorations, and not simply relying on some plastic materials/toys.  Everything must be handmade, from scratch.
 
Wendy made her horses using chocolate, I'm no good in handling chocolates so this option is out.  After a few sleepless nights, I decided on a gingerbread cookie.  I didn't want butter cookies as I'm not a butter person.  Moreover, this gingerbread cookie is a chewy cookie, relatively light (ie weight) if you compare with other cookies.  I made the cookies 3 days ahead, at 1am.  By the time I was done washing and packing up, it was already 3 in the morning.  The next few nights weren't any better.  I had to pipe the outline, leave to dry before I could flood the cookie and start piping the colours.  A lot of time was spent on the cookies.
 
For the cake base, I made an orange chiffon cake with 6 eggs.  I only like chiffon cakes in layered cakes, they are so light and soft.  However, that's where my fear comes in.  Can the chiffon cake support another cake on top?  I read through Wendy's entry again and again, it seems that it is doable to just stack the cake with a middle support and some straws.

I wanted to make my own candles too upon seeing NC's pictures but she told me she has extras and offered me one!  Yippy, now I don't have to make my own.

Looks like I'm all done?  Wrong.  I made 2 portions of SMBC (black raspberry powder) but they don't look like it is enough for the fillings, crumb coat and frosting of both cakes.  I suspect it's probably enough for 1.5 cakes.  I do not have enough time to make another batch so did a quick check with my neighbor, NC, to see if she has any frozen stash.  Thankfully I have this neighbor who bakes.  She did a few trials for her daughter's birthday cake just 2 weeks ago and there were leftover IMBC (red raspberry powder) in her freezer.  I don't care, I don't mind, I just grabbed her offer and frosted the bottom cake with her IMBC and the top cake with my own SMBC.  I believe I could have done a better decorating job if I had sufficient buttercream.

Enough said, let the pictures do the talking.


And these are all you need to stack the cakes.

Besides the carousel cake, DD3 requested for a butterfly cake.  That's another long story behind and I won't bore my readers here.

Not the perfect looking cake but my birthday girl is happy, so who cares if it looks horrendous?  Hahaha!

 Chocolate chiffon cake with pitted cherries and dairy whipped cream.
 

Monday, February 4, 2013

Homemade Bak Kwa

My apologies for disappearing for the past 3 months.  We were busy traveling during the school holidays, made a trip to Taiwan in Nov and 2 road trips to Malacca in Dec.  When we finally returned, it was time to prepare kids for school.

I made bak kwa some years ago but didn't get a chance to blog about it.  And since CNY is just round the corner, here's the recipe for those interested to make them at home.


Homemade Bak Kwa
Recipe adapted from Gan55
Ingredients
1 kg minced meat
2.5 tbsp fish sauce
1.5 tbsp light soy sauce
2 tbsp dark soy sauce
1.5 tbsp lee kum kee char siew sauce (I replaced with oyster sauce)
2 tbsp cooking wine
1 1/4 cup brown sugar
1 small drop 玫瑰露 rice wine (I  omitted)
Method

Mix all of the above and stir in 1 direciton.


Mix till the meat becomes gooey.


On a baking tray lined with parchment baking paper, spread out meat with a spoon.

Put another piece of baking paper (I used plastic sheet) on top and roll it thin (around 3mm) with a rolling pin.

Try to keep the edges as straight as you can so you can cut into neat squares.  After rolling, remove the baking paper/plastic sheet on top.


Bake in a preheated oven on 125C for 25-30 mins.  The bak kwa is ready when the entire top surface is dry to the touch and is holding together without breaking.  The underneath of the bak kwa will be moist but it is ok.  When slightly cool, use a kitchen scissors to cut the bak kwa into squares or any shapes/size you like.

Cool completely.  Place sheets of of baking paper between each slice of bak kwa.  Wrap with clingwrap and keep in a container to chill/freeze.  When needed, reheat in grill/microwave/toaster oven/oven.

Friday, October 12, 2012

Blue Pea Flower Konnyaku Jelly


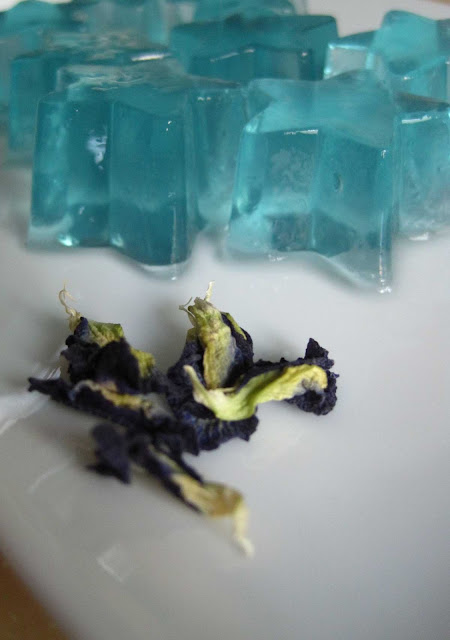
Extremely hot weather these days so I prepared some jellies for the kids.  I don't like the idea of using artificial colours so I used Blue Pea Flowers(Butterfly Pea/Clitoria ternatea/Bunga Telang) freshly harvested by Aunty A.
 
Check out the lovely blue!
 
Perfect dessert for a hot weather!
 
  
Blue Pea Flower Konnyaku Jelly
Ingredients
200 ml hot water
1 tbsp dried blue pea flowers
1 packet of konnakyu jelly powder (you may use agar agar powder too)
180g sugar (add more if you have sweet tooth)
900 ml water (we prefer a softer texture)
Some pandan/screw pine leaves, washed and tie into knots
 
Method
  • In a small bowl, soak the blue pea flowers with hot water. 
  • Leave it for 30 minutes or more (I poured out the water and reheat in the microwave and pour it back into the flower). Sieve it and retain the blue liquid.
  • Mix konnyaku jelly with sugar in a small bowl, set aside.
  • In a medium pot, add the remaining 900ml of water and bring to boil over medium fire.
  • Add in pandan leaves and blue liquid.  Simmer for 10 mins.
  • Sprinkle the konnyaku mixture into water gradually and stir till sugar dissolved. Remove pandan leaves.
  • Pour into prepared jelly moulds and leave to cool. Refrigerate for a few hours before serving.

Tuesday, October 9, 2012

Easy Peasy Nutella Brownie Muffins

Are you looking for a simple recipe for your little ones to try out at home?  I found one and this was made by my child.  She was 3 yrs 8 months when she did this.

Nutella Browne Muffins
Ingredients
1 cup Nutella
3 eggs
10 tbsp self raising flour
Some Choc Chips

Method
Preheat oven to 180degrees Celcius.


Add Nutella into a mixing bowl.  Crack in eggs.

 Still cracking...

 Whisk Nutella & eggs till well combined.

Add in flour a tablespoon at a time.  At this time, you may ask Mommy to make herself a cup of coffee or tea while waiting.  When all flour are added, whisk till smooth.

Scoop into muffin paper cups* (1/2 full) with the help of an adult.  Then sprinkle choc chips on top.  Count to ensure all muffins have equal amount of choc chips.

Ask an adult to help you bake the muffins for 20mins or till wooden skewer comes out clean.


Remove from oven and place them onto rack to cool down.

If you can't wait too long... do the following...

Blow....


*Note:
If you are using muffin tins, you will need to oil/ butter them 1st for easy removal after baking.
You can also combine choc chips into the batter instead of sprinkling them on top.

Wednesday, September 12, 2012

Sweet Potato Mantou

Made these in March 2012


I've bookmarked this recipe from Wendy's blog for the longest time but just couldn't find a chance to make it.  The body engine just refuse to ignite.  Along the way, this recipe was forgotten until I saw Wendy's Rose Mantou, so pretty!!

I tried my hands on rose shaping but see how they turned out, pathetic looking roses.  After the 2nd proof, the dough look nothing like roses, just a pile of mess :-(

Googled and found this easy to make rose method by Kristy. With some leftover lotus paste from last year's mooncake making, I used them as fillings here.


Though not perfect, these definitely look more like a flower (^_^)

Or should I just stay with croissant shaping?

Soft and fluffy inside, not too sweet too.  I like :-)
 
Sweet Potato Mantou Recipe
Ingredients
250g steamed sweet potato
150ml water (if using purple sweet potato, use 200ml water)
500g Pau/Hong Kong/Super Lite flour
1 tsp baking powder
100g sugar
50g shortening/Crisco (I used butter instead)
1/4 tsp salt
11g instant yeast (I used 3 tsp)

Method
  1. Mash sweet potato, or blitz sweet potato with 120ml water to get a fine paste.
  2. With balance of water, mix with yeast.
  3. Combine everything except shortening and mix to form a dough.
  4. Put in shortening and knead until dough is smooth. Add slightly more flour is dough is way too sticky to handle. If the dough is sticky but can retain its form, like not slacking down, just continue to knead, the gluten just hasn’t form, there’s no need to add extra flour.
  5. Cover and let dough proof until double, about 45 mins.
  6. Punch down dough and knead for 1-2 minutes.
  7. Divide dough into 50gm portions and shape accordingly.
  8. Cover and let the formed dough proof until doubled for another 45 minutes.
  9. Steam on high heat for 12 minutes.  

Monday, September 10, 2012

Simple Bitter gourd with Egg Soup 苦瓜蛋汤

My sister is very active in the RC (Residents' Committee) and she gets to meet the MP (Member of Parliament) whenever there's an event in their neighbourhood.  She learns this soup dish from her MP, Mr Baey Yam Keng and I've been cooking it whenever I need a quick fix.  I have another recipe of cooking bitter gourd with carrot but for that recipe, I need to simmer the soup for an hour.

No hard and fast rules, no exact recipe.  Feel free to adjust the ingredients to suit your family's need.

Bitter gourd Soup
Ingredients
1 bitter gourd, sliced
3-4 eggs, beaten
some shallots (sometimes I use ginger or dried shrimps, depending on what I have)
1000ml - 1200ml dried anchovies stock
Salt and pepper to taste

Method

In a pot, heat up some oil and add shallots/ginger/dried shrimps.  Fry till fragrant.

Add sliced bitter gourd

Stir fry till soft

Pour in beaten eggs

Scramble....

Pour in dried anchovies stock and bring to boil.  Season with salt and pepper, serve hot.

Thursday, September 6, 2012

Mooncake piglets 豬仔餅

I'm early this year :-)  I've learnt my lesson for the past few years, never make baked mooncakes last minute.


My dear friend, SL, will be helping me to get the lotus paste again this year.  She prefers to buy the ingredients closer to the actual day, to ensure that the ingredients are the freshest.  So while waiting for my low sugar lotus paste to arrive, I made 豬仔餅 to ease my itchy hands.

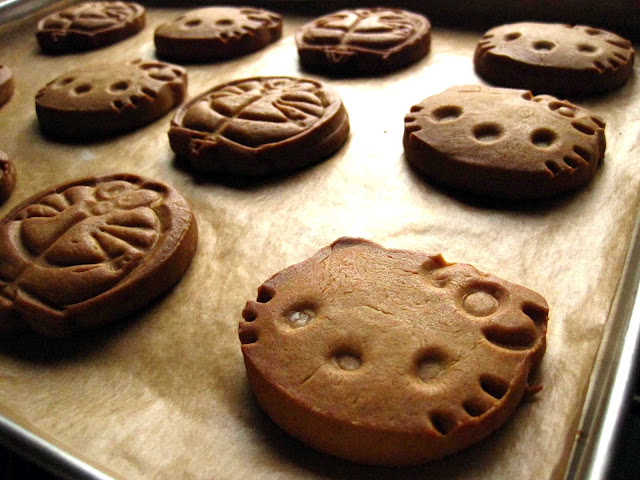
Using the regular recipe, I tweaked the method a little as I was rushing to leave the house.  I skipped the glazing as I personally find the piglets too sweet when I made them last year.  Without the glaze, the mooncakes' appearance are matte but still, I think they look alright.

I'm not sure if the resting of baked mooncakes was required to cool the moonies down first before glazing.  I did it anyway but only for 10 mins instead of recommended 30 mins.  In my next attempt, I think I'm just going to bake them for 20-25 mins straight.


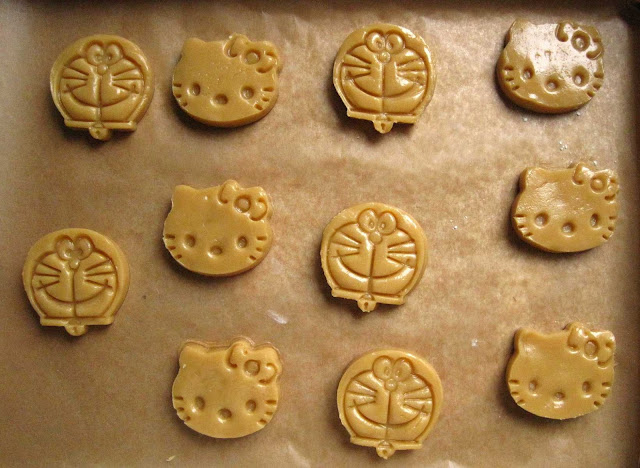
The piggies before baking

After 1st bake, resting for 10 mins before returning to the oven

Nicely brown 豬仔餅.  My kids are happy, so am I :-)  I hope my recipients are happy to receive them too.

Traditional Baked Mooncakes
Yield 11 pieces weighing 34g each

Ingredients
(A)
200g Hong Kong Flour

(B)
120g Golden syrup/Sugar syrup
60g Peanut oil (I used soy bean oil)
1/4 tsp Alkaline water
* mix together

Method

  1. Sift hong kong flour into a mixing bowl.
  2. Pour in (B), combine well to get a smooth dough in one direction.
  3. Cover with cloth, let it stand for 20 minutes.
  4. Divide dough to portions of 34g each.
  5. Roll into a ball,
  6. Lightly flour the mould. Place mooncake in mould, flatten, dislodge the mooncake (I used a cookie cutter with stamper).
  7. Bake in a preheated oven at 180°C for 15 mins, remove and let it cool for 10 mins.  Continue to bake for another 10 mins at 180°C.
  8. Remove mooncakes from oven and leave to cool.
  9. Store for 3 days before serving