Friday, July 31, 2009

Steam Moist Chocolate Cake


A forumer, Dralion, from Kitchen Capers shared this recipe and many whom tried gave thumbs up for this super duper moist cake. I'm not a chocolate fan but having itchy hands, I made this and my family likes it. I made it so often then until DH had enough of it. Think the last time I made this was for DD1's birthday last July.

This is the cake on it's own without any decoration or frostings. We usually eat it plain but today, I felt like having something different.

With a bunch of bananas ripening fast and kids won't be home till late, I sliced the cake into 3 layers and filled it up with sliced bananas and fresh cream. As usual, I couldn't do a nice frosting so I had to use chocolate ganache to cover up my flaws.


I started pouring 1/2 portion of the ganache and tilt the cake board slightly for the ganache to flow down. Then I scooped a tablespoon at a time and pour over the edges of the cake to cover the corners I've missed. I had wanted to cover the whole cake with chocolate ganache but I do not know how it's done so neatly. So I just left it as it is.

Yes, I've been stingy in my cream as I'm not a cream person. If someone offers me a cake with thick cream, I'll definitely scrape it away before indulging in the cake. And in order to get a thin cream layer, I had to slice the bananas really thin as well.

This is the non-dairy whipping cream I used for the frosting. I've yet to venture into dairy whippingcream :P

The original recipe yields a very huge cake. Recipe posted here is already halved (and modified as I've reduced sugar and cocoa powder), which is good for 8" or 9" cake pan. Remember to use good quality cocoa powder as this is truly a very delish cake. You don't want to ruin the cake with some low grade cocoa powder which leaves an aftertaste.

Steam moist chocolate cake
Ingredients

185g unsalted butter or corn/sunflower oil **
180g castor sugar (you may use up to 230g)
200ml evaporated milk (low fat or full cream)
2 eggs, lightly beaten
110g cake flour (you may use plain flour)
45g good quality unsweetened cocoa powder (you may use up to 60g cocoa powder)
1/2 tsp baking powder
1/2 tsp baking soda
1/2 tsp vanilla extract

Method

  1. Heat up the steamer.
  2. Lined and greased a 8 or 9 inch baking pan.
  3. Combine castor sugar, evaporated milk, vanilla extract or essence and butter in a saucepan. Stir over low heat until sugar is dissolved and butter is melted, off fire and leave to cool.
  4. Add the beaten eggs into the evaporated milk mixture and stir till well mix.
  5. Sift the flour, cocoa powder, baking powder and baking soda into a large mixing bowl.
  6. Pour the eggs mixture over the flour and stir till well mix (cake batter should be runny).
  7. Pour the batter into prepared pan, cover the top of the pan losely with a piece of aluminuim foil.
  8. Steam over medium heat for 45 mins.
  9. Cool the cake in pan before turning out for further decoration.

Notes
** If using corn oil simply mix all ingredients up and stir till well blended.

Thursday, July 30, 2009

Matcha Chiffon Cake

Just 2 weeks ago, I was on instant messenging with brother M and was casually asking if he could ask his friend in Japan to get me some good quality baking matcha (green tea powder). To my pleasant surprise, he mentioned his friend will be visiting soon. Of course, I can always get matcha locally but those sold in bakeware shops leaves an artificial aftertaste. Good quality matcha are available in local Japanese supermarkets but how often do I get a chance to go out shopping in town? Anyway, his friend came last week and brought me 2 cans of matcha :)

A simple but lovely packaging.

A close up of the matcha can.

Instead of baking in my usual 8" round, I baked them in 4 small cake pans. Only showing 3 here as the other cake was already eaten up by my kids ;-)

While I'm updating my blog here, I just realised the recipe calls for 1 TBSP honey which I swear I didn't see it at all. I went through my scribbled note and yes, there's no honey in my notes. And I found another "mistake", recipe calls for 2 - 3 tsp matcha but I've copied down as 4 tsp (I used 3 1/2 tsp though). Good grief, don't tell me my eye sight is getting from bad to worst? Too old for lasik now... Anyway, even without the honey, it taste good and despite the strong fragrance, my kids (including DD3) enjoyed this cake very much. However, I'll reduce the sugar by another 10g - 15g as I find it slightly too sweet for my family.


Recipe adapted from here

Matcha Chiffon Cake
(20cm tube pan)

Ingredients
(A)
4 egg yolks
30g castor sugar
pinch of salt

(B)
4 tbsp warm corn oil
80ml warm water
3 1/2 tsp matcha

(C)
100g cake flour
3/4 tsp baking powder
*sifted

(D)
4 egg whites
1/2 tsp cream of tartar
40g castor sugar

Method
  1. Cream ingredients (A) with hand whisk till sugar dissolved.
  2. Add in ingredients (B) in the respective order and mix well before adding the next item.
  3. Sieve in ingredients (C) and mix till no lumps.
  4. Beat egg whites with electric beater till frothy, sprinkle in the cream of tartar. Beat till white in colour and add in sugar by thirds. Egg white should be beaten till stiff peaks are formed.
  5. Put half portion of egg white into yolk mixture and mix it with a hand whisk in 6 strokes.
  6. Pour yolk mixture into the rest of the egg white and mix well with hand whisk.
  7. Put batter into a chiffon cake pan, bang the pan on a hard surface several times to release the bubbles and bake at 170C - 180C for 35 -45 minutes or till cooked.
  8. When the cake is cooked, remove from oven and give it another bang on a hard surface to loosen the cake texture then invert cooked cake on a wire rack to cool for 15 - 20 minutes. Remove cake from cake pan and leave aside to cool completely.

Tuesday, July 28, 2009

Mayonnaise Chocolate Cake


Yes, this is a chocolate cake with mayonnaise. It is a recipe without eggs and fats. And what I like most about this cake is, no mixer needed!

I've baked this a few months ago in a loaf pan but today, I was lazy and didn't want to wait too long for the cake to bake so I piped them into my mini donut and bundt pans. I made quite abit of boo-boo when I did this cake.

  1. Recipe asked for baking soda but I misread and used baking powder instead. Upon realising my mistake, I try to salvage by scooping up some baking powder which is already mixed with the cocoa powder. Then I added 1 tsp of baking soda to the mixture. As there were both baking soda and an overdose of baking powder, the cake rose up by double the size.
  2. Instead of adding sugar to the dry mix, I added into the mayonnaise.
  3. My pans were not entirely dry although I did dry it with kitchen towels. I also greased them before pouring in the batter but the cakes still get stucked and I couldn't unmould them.


Despite the silly mistakes, the cake still taste yummy.

Mayonnaise Chocolate Cake
Ingredients
110g mayonnaise
125ml buttermilk
1 tsp vanilla essence
120g all-purpose plain flour
20g cocoa powder
1-1/2 tsp bicarbonate soda
110g sugar

Method
  1. Line a 7" square baking tin with parchment paper (no need to grease).
  2. Sift flour, cocoa and bicarbonate soda together.
  3. Place the sugar and sifted flour mixture into a bowl.
  4. In a separate bowl, mix the mayo, vanilla essence and buttermilk till smooth.
  5. Add mayo mixture to the flour and mix till the batter is smooth.
  6. Pour mixture into prepared pan and bake at 170 deg C for 20-25 minutes.
Note
If you have no buttermilk, you can add 1-1/2 tsp of lemon juice to a glass of milk to make up to 125ml.

Monday, July 27, 2009

Pork Chop Piri Piri- Portuguese

This is a very interesting recipe, it uses red bell pepper as marinate. Looks bloody and spicy but not at all as I omit the chilli padi orignally called for.

I didn't follow the cooking instructions but grilled it in my AMC roasting pan.

This was our simple dinner :-)

Recipe came from a forumer, Hungrybear of Kitchen Capers but she has got her own blog here.

Pork Chop Piri Piri - Portuguese
(recipe is for 2.5kg chicken but I used pork chop instead and reduced the marinate accordingly)

Ingredients
Meat
2.5 kg chicken, cut into 10 or 12 pcs
** Make very deep cuts into individual pieces right to the bone.

Sauce
2 BIG red bell pepper, seed removed, cut up roughly
12 chilli padi (I omit since I have young children eating)
8 clove garlic (depending on your taste)
4 tablespoon Vinegar
Pinch of salt
4 tablespoon Extra Virgin Oil
** Blend all together and pour into a big bowl.
** Rub paste well into chicken pieces and especially into the deep cuts.

Method
  1. Cook chicken at room temperature.
  2. Pan smoking hot, add about 4 tablespoon of olive oil.
  3. When oil is heated through, skim off marinate, add chicken pieces into pan.
  4. Do not turn over for at least five minutes, giving the chicken a chance to brown.
  5. Turn half way through, when both sides are slightly brown, add in rest of the marinate.
  6. Sitr and mix thoroughly, cook on high heat. Do not stew the chicken.
  7. Scrap the pan occasionally to prevent the paste from burning too much.
  8. Three quarter way into pan frying, add 1 tablespoonful of white/brown sugar or honey, mix and stir well.
  9. Adjust seasoning when chicken is ready, off the fire and squeeze a lemon juice over the chicken, mix well and ready to serve.
  10. Serve with a green salad or plain white rice.

Sunday, July 26, 2009

Earl Grey Tea Cream Puffs

With my leftover earl grey mousse, I didn't want it to go to waste so I made some choux pastry. I've heard so much raves about Florence's choux pastry and decided to try it. The choux pastry does not deflate even when it's cooled. But this recipe is slightly more time consuming than my regular recipe. If you have time to stand in front of the stove, do give this recipe a try. It's definitely worth the effort.


I have some leftover mango mousse so I just filled them up into the choux pastry.

Choux Pastry
Ingredients (8 puffs)
85ml water
50g butter
pinch of salt
1/4 tsp sugar
1/4 tsp vanilla essence
50g bread flour
20g cake flour
2 eggs (lightly beaten)

Method
  1. Cook water, butter, sugar and salt in a saucepan till bubbling hot. Turn the heat to low.
  2. Add in the flour mixture in one go and mix with a wooden spoon till a dough is formed.
  3. Still on low heat, cook the dough for 1 - 2 minutes till a thin white film is formed at the bottom of the saucepan.
  4. Transfer dough to a mixing bowl and beat till it is lukewarm.
  5. Add in egg by thirds and mix till well blended and smooth.
  6. Place batter into piping bag and pipe it onto a lined pan in rounds of about 5cm in diameter. Spray some water on it.
  7. Bake at 200C for 25 minutes then 180C for 8 - 10 minutes or till dry and golden brown in color. Turn off the oven and let it cool in the oven for 30 minutes.

Earl Grey Mousse Cake

I remember I have this Grey Mousse Cake recipe somewhere in my harddisk but I just can't find it. Then I recalled, it was in my old PC, where my harddisk died on me and all my precious recipes were gone. I googled but couldn't find any relevant recipes. As a novice in baking, I'm not adventurous to tweak recipes because I'm afraid of failures. But I love Earl Grey tea and I just want to eat Earl Grey mousse cake!

With that, I attempted to try out the recipe from the Mango Mousse Cake and substituted mango puree with earl grey tea.

The balance cake base from my mango mousse cake was stored in the fridge with cling-wrap so I thought the cake would have "shrunk" a little, thus I didn't bother to trim the sides of the cake. Apparently, this is not the case. The mousse didn't flow down to cover the whole cake :-(

I wanted to do a chocolate crumble topping but I have time constraint so I tried to shave some chocolates but it was a disaster. Thawed the chocolate slightly and tried shaving with a peeler/spoon. Think the weather in Singapore is just too hot as the chocolate melted really fast and it created such a mess. Thank goodness I was wearing a disposable glove and the chocolate only stained the glove. After some struggle, I gave up and make do with whatever shaved chocolates I have. Maybe I should have just used a knife and chop, chop, chop!

The earl grey flavour is subtle in this cake so if you want a stronger flavour, be sure to make the tea very strong by adding another 1 - 2 tea bags. The mousse didn't set very well, I'll have to increase the gelatin to 3 - 3.5 tsp instead.
I love this cake! ^-^

Earl Grey Mousse Cake
Ingredients
230ml boiling water
5 Earl Grey Tea bags
4 tsp sugar
200ml Non Dairy Whipping cream
2 1/2 tsp gelatin powder
60ml hot water
Method
  1. Pour the boiling water over the tea bags and infuse for 10 minutes.
  2. Strain the tea into a measuring jug and make up to 200ml with additional water, if necessary.
  3. Add sugar to tea and mix well till sugar dissolve. Set aside.
  4. Dissolve gelatin in 60ml hot water. Keep warm for use later.
  5. Whip cream till 70% stiff or mousse state.
  6. Add gelatin solution into tea and mix well.
  7. Add tea gelatin mixture into whipped cream and combine well.

Cherries again

We were at Carrefour on Saturday morning and saw the cherries on offer @ SGD8.50/kg. What a rare sight! Grabbed 3 bags of slightly more than 2kg without hesitation ^-^

Saturday, July 25, 2009

Roasted Whole Chicken and Vegetables

Yesterday, I was at the supermarket and saw this frozen bird in the freezer, it weighs only 1kg. I got really excited and grabbed a pack without hesitation as I've always wanted to roast a whole chicken but never get a chance to do. The chickens here weighs easily 2kg and above, this is definitely too much for my family.

I'm not a person with many spices at home. The common condiments are salt, pepper, ketchup, soy sauce. And the only herbs I have is thyme though I'll very much prefer rosemary in a chicken. Oh well.. I just seasoned the chicken with salt and stuffed some garlic into the cavity.

I roasted some hard vegetables to go along, potatoes, carrot, sweet potatoes and a few cloves of garlic. Drizzled some olive oil and seasoned with salt and pepper, give it a stir and bake together with the chicken (in a separate pan).

Thawed my frozen blueberry and cranberry bread, put them into the toaster oven to crisp it up and served with melted butter. The kids love their dinner tonight minus the roasted carrot. DH likes the chicken too but he felt that there's not enough staple food. Alright, will remember to cook some rice next time.

Friday, July 24, 2009

Mango Mousse Cake


Following my post on DD1's birthday, I'm back with updates.

DD1 loves this cake. I attribute that not to my skills but the shape of the cake, it's heart shape! Hahaha!!

This is the most tedious cake that I've ever attempted. It looks simple and straight forward but time consuming. I baked the cake in the afternoon, thinking I could assemble at night when all the kids are asleep. However DD3 wasn't too cooperative last night and woke up every hourly. I started to assembly the cake at 8pm, then tuck the kids to bed at 9pm, sliced the mango, prepare the mousse and did some chores. With DD3's frequent disturbance, I only completed this cake by 1am. Florence's recipe does not require chilling the first layer of mousse but I was disturbed by DD3 and had to quickly chuck the 1/2 assembled cake into the fridge. When I returned to the kitchen 15 mins later, I thought it's much easier to handle the cake as the first layer is slightly set.


Though the cake is well received, I find that the mango puree gives an aftertaste, somewhat artificial. Best to use fresh mango and make the puree yourself.

I used up 1/2 the chiffon cake and have another 2 slices in my fridge. Need to think of how to utilise them, maybe I should make an earl grey mousse cake?

Mango Mousse Cake
Recipe adapted from here

Chiffon Cake Base recipe
Ingredients
(A)
4 egg yolks
1/4 tsp salt
40g castor sugar

(B)
60ml corn oil
125ml water

(C)
150g cake flour
3/4 tsp baking powder
*sifted together

(D)
4 egg whites
1/2 tsp cream of tartar
40g sugar

Method

  1. Mix ingredients (A) well with a hand whisk.
  2. Add (B) into yolk mixture.
  3. Stir (C) into yolk mixture.
  4. Whip egg whites in a clean mixing bowl until big bubbles are formed. Add in the cream of tartar and whip until white in colour. Add in sugar over 3 times and whip until egg whites is stiff.
  5. Pour 1/2 white into yolk mixture and blend well.
  6. Pour yolk mixture into the remaining egg white mixture and blend well.
  7. Pour batter into clean baking pan and bake at 175C for 45 minutes or until cooked.
  8. Invert cake and leave to cool.
  9. Cut cooled cake into 2 layers (**I cut mine into 4 layers**).

Mango Mousse recipe
Ingredients
350ml Non Dairy Whipping cream
300ml Mango Puree, unsweetened
180g Mango, diced into cubes
1 tbsp + 2 tsp gelatin powder
60ml hot water

Mango Puree Topping Recipe
Ingredients
100ml mango puree, unsweetened
2 tsp gelatin powder
50ml hot water

Method

  1. Dissolve gelatin in 60ml hot water. Keep warm for use later.
  2. Whip cream till 70% stiff or mousse state.
  3. Add gelatin solution into mango puree and mix well.
  4. Add mango gelatin mixture into whipped cream and combine well.
  5. Prepare a cake ring or a springform pan or a cake pan with removable base.
  6. Put 1 layer of cake on to cake pan and top it with mango mousse filling. Add in the mango cubes and top it with some mousse just enough to cover the mango cubes. Chill in fridge for 10 - 15 mins.
  7. Put in the other cake layer and pour all the mousse over it. Chill for 45 mins - 1 hour.
  8. In the mean time, dissolve 2 tsp gelatin in 50ml hot water for mango puree topping. Add gelatin to mango puree and mix well. Strain mixture.
  9. When the mousse is set, arrange sliced fruits on cake and spoon the mango puree topping over fruits and cake.
  10. Chill cake for 3 hours before serving.

Notes
I trimmed my cake to be smaller than the pan so that the mousse will flow down and cover the whole cake

DD1's birthday

7 years ago, I was lying in the hospital with my newborn in my arms. Today, she has turned 7. I can't imagine how time passed so quickly, like the flash of a lightning.

While I'm blogging here, my mind is in a whirl, thinking of the best solution for the forthcoming surgery next week. DD1 is diagnosed with Otitis Media with Effusion (OME) and is scheduled for a surgery on Thursday. DH just called to inform me this morning that he will need to travel to Philippines this Tuesday and won't be back till Friday. This implies that I'll have to bring DD1 to the hospital all by myself. I just called the hospital and was told I can't bring other children along. So what's going to happen to DS2 and DD3? I need to keep my cool to have a clear mind in order to think better. One alternative is to reschedule the surgery which I'm not particularly keen as we've already done that once due to her allergy cough. Another alternative would be to leave my 2 younger ones with my inlaws. But I'm worried about DD3, she's on total breastfeeding and I ain't sure how she'll react since I'm her caregiver from day 1. Oh well, will see how it goes.

Today is DD1's birthday and I made her a mango mousse cake. She had originally asked for a jelly cake but I declined as she has just recovered from her cough and nephew J doesn't like anything mushy (we're going to celebrate her birthday at my inlaws tonight).

I tried out a new chiffon cake base following Florence's recipe but it yields a huge/tall cake. I baked in a heart shaped pan and a 4.5" round pan, when baked, they rose up to the brim of the cake pan. As I don't own any cake rings, I had to use back my heart shaped pan (with removable base) to assemble the cake. Looking at the height of my cake pan, I know I can only add 1/2 the baked cake so I sliced them really thin. The mousse layer is not evenly spread so I had to cover it up with a mango puree topping to hide the flaws :P

Don't know how it'll turn out but the end result sure looks appetitising, at least to me. I hope she will like this cake.


I'll be back for more updates after the cake cutting tonight.

Fish Paste Egg Roll


This is a quick and easy recipe. My kids love it and their first impression is, taste like fishcake ;-)

Fish Paste Egg Roll
Recipe adapted from here

Ingredients
200g Fish Paste
2 large eggs, beaten

Method
  1. Fry eggs in a large, non-stick skillet over low heat. Make sure that the eggs set into a perfect circle for easy wrapping.
  2. When one side is cooked, carefully slide it out onto a chopping board without tearing it.
  3. Place the fish paste onto the fried egg and roll up like a swiss roll.
  4. Place it seamside down on a plate and steam on high for 20mins.
  5. Remove from plate and slice thickly.

Drawings #2

DS2 drew this and wants me to blog about it. I asked him, why are their faces like these? He explained he doesn't know how to draw them feeling happy. Eh... I cannot comprehend since he drew happy faces before... Kids....

Blueberry Milkshake


Blueberries and Antioxidant Activity
Antioxidants are thought to help protect the body against the damaging effects of free radicals and the chronic diseases associated with the aging process. Fresh fruits, including blueberries, and vegetables contain many of these naturally occurring antioxidants such as Vitamins C and E. Blueberries contain 14 mg of Vitamin C and 0.8 mg Vitamin E per 1 cup of blueberries. In addition, blueberries contain anthocyanins and phenolics that can also act as antioxidants. Based on data from the USDA Human Nutrition Research Center on Aging (Boston, MA), blueberries are among the fruits with the highest antioxidant activity. Using a test called ORAC (Oxygen Radical Absorbance Capacity), researchers have shown that a serving of fresh blueberries provides more antioxidant activity than many other fresh fruits and vegetables. Read a
research excerpt on the antioxidant activity of blueberries.

Blueberry is the No. 1 antioxidant fruit, followed by cranberries, then strawberries. And with blueberries in season now, have you had your blueberries today?

Noobcook shared a blueberry milkshake recipe and I made it for the kids. They love it! Who doesn't since it's loaded with ice cream and their favourite blueberries? Hahaha!!

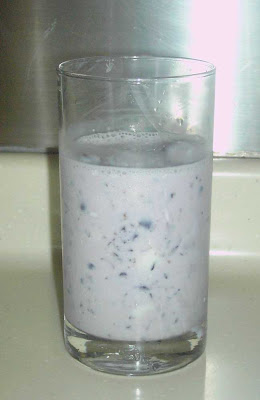
I didn't follow the recipe but use it a guide and scoop some ice cream into the blender. And instead of milk, I added 2 tablespoon of plain yogurt. With no exact measurements, this is obvious why my milkshake doesn't fill up the glass :P

Blueberry Milkshake
Ingredients
(Makes one tall glass, or 2 1/2 short glasses for dessert)
200g vanilla ice cream
1.5 tbsp milk/plain yogurt
150g fresh blueberries

Method
  1. Blend everything till smooth, do not overblend or it will become watery.
  2. Garnish with some marshmallows and blueberries if you like.

Thursday, July 23, 2009

Simple Stir Fry Pasta


Our lunch today, stir-fry pasta with celery, carrot, white button mushrooms and minced meat. Yes, it's one of those lazy days again.

Wednesday, July 22, 2009

Lemon Yogurt Cake

I've a few lemon yogurt cake recipes on hand but I finally decided on this one. With all the ingredients on hand, I quickly whipped up the batter while my cheese chiffon cake is baking in the oven.

This is originally a loaf pan recipe (8 1/2" x 4 1/4") but I'm too lazy to wait another 1 hour since I've already spent 1 hour on my cheese chiffon cake. I used my 9" X 13" cake pan instead to get a thinner cake and reduced the baking time accordingly.

When you bake with yogurt, the end result is usually a soft and moist cake, and that's what I like. I don't like butter/pound cakes which are really heavy.

I had originally wanted to add some fresh blueberries into the batter but since I've already incorporated some into my cheese chiffon cake, I decided against it. Maybe next time. If I were to bake this again, I think I'll skip the lemon-sugar mixture but incorporate lemon juice into the batter as I find it messy when I pour the mixture over the warm cake.

Recipe modified.

Lemon Yogurt Cake Recipe
Ingredients
(A)
180g all-purpose flour
2 teaspoons baking powder
1/2 teaspoon salt
*sifted

(B)
200ml plain yogurt
150g sugar
3 extra-large eggs
1/2 teaspoon vanilla essence

(C)
120ml vegetable oil

(D)
65ml freshly squeezed lemon juice
50g sugar

Method

  1. Preheat the oven to 180C. Grease and line 8 1/2" by 4 1/4" baking pan with parchment paper.
  2. In a bowl, whisk (B) till well blended. Slowly whisk (A) into (B), mix well. Fold in (C), making sure it's all incorporated.
  3. Pour the batter into the prepared pan and bake for about 50 minutes, or until a cake tester placed in the center of the loaf comes out clean.
  4. Meanwhile, cook (D) in a small pan until the sugar dissolves and the mixture is clear. Set aside.
  5. When the cake is done, allow it to cool in the pan for 10 minutes. Carefully place on a baking rack over a sheet pan. While the cake is still warm, pour the lemon-sugar mixture over the cake and allow it to soak in. Cool.

Tuesday, July 21, 2009

Cheese Chiffon Cake with Blueberries

Before I started baking chiffon cakes, I was horrified with all the failures. The more I read, the more terrified I became. I still remember going through Rei's blog several times but still lack the courage to bake one. I also visited baking forums and surfed the net on how to whisk the egg whites correctly. Finally took a step forward and baked my "virgin" chiffon. I'm fortunate to be successful in my first attempt and this is like a booster jab to my confidence.

I just bought another 5 punnets of fresh blueberries from the local supermarket this morning. With so many punnets sitting in my fridge, I decide to incorporate blueberries into my cheese chiffon cake.

I was disheartened when I saw the sunken fruits in my lemon yogurt cranberries chiffon cake. Keeping my fingers crossed while unmoulding, I'm glad to see only a handful of blueberries at the base ^-^

Upon slicing, this is what I get.


Cheese Chiffon Cake with Blueberries
Ingredients
(A)
60g milk
40g cream cheese
25g butter

(B)
65g Cake/Top flour (sifted)

(C)
4 large egg yolks

(D)
4 large egg whites100g sugar (I used 70g)
pinch of salt
1/8 tsp cream of tartar

(E)
100g fresh blueberries, coated with 1 TBSP of cake flour

Method
  1. Preheat oven 170˚C.
  2. Cook (A) over double-boiler until well blended and thickens. Remove from double-boiler and let it cool down.
  3. Add (C) into cooled down cheese mixture and mix until well combined.
  4. Fold in (B) and (E) and mix well.
  5. Beat egg whites until frothy, add cream of tartar and beat till soft peaks. Add salt and sugar gradually and beat till stiff peaks.
  6. Fold 1/2 of the egg whites into cheese mixture, gently with a rubber spatula until just blended.
  7. Pour cheese mixture (step 6) into the rest of egg whites, fold it gently with rubber spatula until blended.
  8. Pour batter into a 9-inch (22cm) chiffon cake pan, bang the pan on a hard surface to release the bubbles.
  9. Oil a piece of aluminium foil and cover the pan loosely. Bake at 170 deg.C for 15mins.Turn down the temperature to 160 deg.C and bake for another 25 mins.
  10. Remove the foil and reduce the temperature to 150 deg.C and bake for another 10mins or till cake is cooked and nicely browned.
  11. When the cake is cooked, invert the cake to cool. Remove the cake from the cake pan when it is completely cool.

Saturday, July 18, 2009

Blueberry and Cranberry Loaf

I saw this recipe in Irene's blog and gave it a try. It is originally a breadmaker recipe but again, I prefer to bake it in my oven.

I made 12 small buns and a small loaf, omit egg wash as I just couldn't be bothered lately. The pictures didn't turn out quite well, I think they are slightly over-exposed?

Here's a cross-section of the bread.

Here's another.

The loaf, sliced.

This bread is basically quite bland as no sugar and salt are added. However, with the cranberries and blueberries, they helped to sweeten the bread and it taste good with some butter/margarine.

Recipe originally asked for 350ml water but I used up 300ml as the dough is wet and difficult to handle. But of course, if you are using the breadmaker to bake, you may just follow the original recipe.

I'm posting my modified recipe.

Blueberry & Cranberry Loaf
Ingredients
(A)
300ml water
25g butter
500g Bread Flour
1 1/2 tsp yeast

(B)
50g fresh blueberries, finely chopped
75g dried cranberries, finely chopped
1 tsp cinnamon

Method
  1. Mix cranberries, blueberries and cinnamon in a mixing bowl, set aside for further use.
  2. In a big mixing bowl, mix all ingredients together.
  3. Knead dough until dough is elastic and smooth.
  4. Place it in a large greased bowl. Cover the bowl with a damp cloth or cling-wrap and leave it to proof in a warm place till double in size (about 1-1.5 hrs).
  5. When proofing is completed, punch down the bread dough to release the air.
  6. Roll out dough and wrap with berries mixture.
  7. Shape as required and let it proof on lined or greased baking tray for another 50-60 mins or until dough is double in size (about 1 hr).
  8. Bake in preheated oven at 170C for 20-25 minutes.
  9. Remove bread to cool on rack completely.

More Durian Puffs

Just want to finish up the durian fillings in my fridge so I made another batch of durian puffs.

Using the same choux pastry recipe though I'm still in search for a recipe that's similar to Beard Papa's. This recipe is quite good, doesn't flatten when cooled and it's still good on the next day.

This time round, I made the choux slightly bigger.

As I've used up 3/5 of the durian fillings earlier, I wasn't able to fill up as much now.

This box went to my inlaws ;-)

Friday, July 17, 2009

Banana Chiffon III

I don't usually have left over bananas as all my 3 children loves bananas. After using up some for the banana muffins, I still have a 6 - 7 bananas waiting to be consumed. They are way too ripe to be eaten on it's own. With the intention of baking a cake for DS2's form teacher, I made a banana chiffon cake.


Original recipe calls for 4 egg yolks and 5 egg whites but I had 2 egg whites frozen together so I use them all. With the additional egg white, I have an extra smaller cake.

Also, after peeling the bananas, I realised I've got 200g of mashed bananas instead of 180g. I was feeling lazy and couldn't be bothered to remove that extra 20g.

My initial plan was to give the teacher the bigger cake but I made a boo-boo while unmoulding it. How can I possibly give away a cake that's "disfigured"?

Luckily I still have a smaller cake from the extra egg white so this cake went to the teacher instead.


Banana Chiffon Cake
Ingredients
(A)
4 egg yolks
40g castor sugar
1/4 tsp salt
40g corn oil
200g mashed bananas (I use the blender)

(B)
120g Cake flour
1/2 tbsp Baking powder
1/8 tsp Baking soda
*Sift 2x

(C)
6 egg whites
40g castor sugar
1 tablespoon lemon juice

Method
  1. In a bowl, using hand whisk, whisk yolks and sugar till sugar dissolves.
  2. Add oil and salt, whisk and add mashed bananas. Stir well.
  3. Fold in sifted flour and mix well.
  4. In another bowl, using an electric mixer, beat till the whites are frothy. Add in lemon juice and beat till soft peaks. Add in sugar gradually and beat till stiff peaks.
  5. Fold in 1/3 of the whites into the yolk mixture using a rubber spatula till incorporated.
  6. Pour the mixture to the remaining egg whites and fold in gently till incorporated.
  7. Pour the batter into a chiffon tube pan. Bang the pan on the table to get rid of bubbles.
  8. Oil a piece of aluminium foil and cover the pan loosely. Bake at 170 deg.C for 15mins.Turn down the temperature to 160 deg.C and bake for another 25 mins.
  9. Remove the foil and reduce the temperature to 150 deg.C and bake for another 10mins or till cake is cooked and nicely browned.
  10. Remove from the oven and invert the pan. Remove the cake from pan when it's completely cooled.